Brainstorm, Developing Ideas
I haven’t received my official briefing for this project,
but I have had a read over the brief on the VLE and I am really excited about
it.
The brief focuses on what we want to do as students for this
project and our future careers. There are a variety of specialist options it
includes such as 3D modeling/sculpting, 2D artwork, texturing etc...
In the last project I developed a number of skills in
texturing and basic modeling using Maya. I have learnt a great deal and wish to
explore the software further to support my 3D portfolio for my aspiration to
become a level designer.
I came across my intended final product for this project
when I was playing Square Enix’s 2010
Supreme Commander 2. I was playing as
who are fundamentally the ‘good guys’ (or UEF) and noticed that their buildings
and vehicles are built in a very simple way, in relation to my particular basic
knowledge of Maya. With this in mind, I took it upon myself to take a shot at
re-building a UEF long range artillery structure, similar to the ones in the
game. As I want to include my own unique style to it, I intend to make a number
of small adjustments, mainly being the textures, to avoid any risks of
copyright over the current in game designated layouts.
To ensure I have enough to back up my intentions for this
project I will conduct extensive research into the UEF’s build structure in
both vehicles and buildings to understand their fundamentals in how all of
their in game content works. Players are allowed to pick a colour scheme of
their choosing in the game too, so I will also look at the different colour
schemes and textures available within the game.
Narrowing the Project Down
Since my last
entry I had my project feedback from BA5 and my lecturer suggested I should
build something that is a follow on from BA5.
I originally had
the idea to build an artillery turret from Supreme Commander 2, but that had no
real strengths to really express my skills in Maya. It was fundamentally not
original and made easy by copying someone else’s work.
The idea my
lecturer had was to model the front of the Japanese shop, where the games
narrative starts (see BA5 blog). My idea is written in detail in my learning
agreement.
I believe that
this project is the most exciting yet, and is a great way to end the 2nd year.
I feel that I have learnt far more about 3D in BA5 than I did in the entire
first year. My lecturer has taught me all about making game ready assets, the
do’s and don’ts of Maya and not to mention UV unwrapping. Sophie, and I have
been working with on the past two projects, has also shown me a great deal
about Photoshop.
I have learnt to
treat Photoshop like Maya, its equally as interesting and sophisticated and I
have been using it a great deal to manipulate textures for my Maya UV maps, to
create the most precise and detailed textures possible.
I have put
together my project schedule, and feel that I can handle this project and
potentially overachieve with more details in my 3D model in conflict to my
learning agreement. It isn’t the end of the world if I don’t because one thing
I have learnt about learning agreements is not to aim too high, because you may
not be able to complete the task you set out to do in the first place.
Here is a copy of
my learning agreement that I am submitting to the uni for approval:
Proposal: What do you intend to do?
Use this area to
outline the intended project.
In
this project I will be following up from BA4 and BA5, where I worked with
Sophie Woollard in creating a game design document to re-invent a crime game we
chose. The game concept we created is a dark, thriller crime game, based around
an interactive narrative and point/click game play mechanic. In BA5 we decided
to work as a team again working both on 3D interactive assets to work in a game
engine, and some form of 2D interactive images, all based around the content
within our BA4 design document. I personally re-created the flat above the
Japanese shop.
For
BA6, using Sophie's 2D concepts and reference images from BA5 I will design and
make a turntable render of the front of the Japanese shop, using Maya, in which
the games narrative begins. I will include a series of lighting effects for
advertisement signs, and separate assets/props outside the shop; being a bench
, traffic cone and a bin. Each being properly UV mapped, unwrapped and
textured.
How
do I intend to do this?
I
will begin my project by conducting extensive research, gathering a variety of
images as references for each asset I intend to build. From these images I will
create a series of hand drawn and digital images using sketchbooks and
Photoshop as part of my pre-production process.
I
will then begin building the assets in 3D using Maya. After I will UV map the
models and manipulate the UV's to fit the textures that I have gathered in my
research.
With
all my assets mapped and textured, I will add lighting to set the scene of the
model and animating a camera, create a 180 degree turntable render, showing the
front of the shop.
Why
do you intend to do this?
I
want to bring the games narrative, style and genre to life, creating a piece of
art that provokes strong feelings of dread, highlighting the games dark
connotations. I aim to convey the sense of lost innocence and darkness that is
in the world today, which is the idea we want to re-create in this game
concept.
Assessment Work:
I
will be submitting the following for assessment:
<!--[if !supportLists]-->ñ
<!--[endif]-->Learning
Agreement
<!--[if !supportLists]-->ñ
<!--[endif]-->2D hand drawn and digital pre-production images
<!--[if !supportLists]-->ñ
<!--[endif]-->Shop turntable render (.mov)
<!--[if !supportLists]-->ñ
<!--[endif]-->Maya project folder containing all the individual
assets and textures
<!--[if !supportLists]-->ñ
<!--[endif]-->Project blog
<!--[if !supportLists]-->ñ
<!--[endif]-->Project 500 word evaluation
<!--[if !supportLists]-->ñ
<!--[endif]-->Self evaluation
Schedule of Work: (to include the deadline for submission of assessment):
<!--[if !supportLists]-->ñ
<!--[endif]-->Research,
collecting source images and blogging findings (ongoing throughout the project)
<!--[if !supportLists]-->ñ
<!--[endif]-->2D
digital/hand drawn pre-productions images
<!--[if !supportLists]-->ñ
<!--[endif]-->3D
asset building
<!--[if !supportLists]-->ñ
<!--[endif]-->Manipulating
textures for 3D assets
<!--[if !supportLists]-->ñ
<!--[endif]-->Add
lighting
<!--[if !supportLists]-->ñ
<!--[endif]-->Combine
separate models together to create the final model
<!--[if !supportLists]-->ñ
<!--[endif]-->Create
a turntable render as .mov file
<!--[if !supportLists]-->ñ
<!--[endif]-->Complete
evaluations and research journal (Blog)
Submission:
10/05/2013
To
see full details of schedule of work, see digital calendar on my Blog or as a
separate PDF file.
Resource
requirements:
I
will be using the following programs for this project:
<!--[if !supportLists]-->ñ
<!--[endif]-->Photoshop
CS6
<!--[if !supportLists]-->ñ
<!--[endif]-->Maya
<!--[if !supportLists]-->ñ
<!--[endif]-->QuickTime
Player
<!--[if !supportLists]-->ñ
<!--[endif]-->Graphics
Tablet
<!--[if !supportLists]-->
ñ
<!--[endif]-->
Sketchbook
(art materials)
Updated learning agreement !
Norwich
University College of the Arts
Learning
Agreement
Course and Unit
Number: Games Art & Design, BA6…………………………………..
Name: Liam Gallagher-Vaes……………………………………………………………….
Proposal: What
do you intend to do?
Use this area to
outline the intended project.
The game concept is a dark, thriller crime
game, based around an interactive narrative and point/click game play mechanic.
For BA6 I will design and make a turntable
render of the front of the Japanese shop, using Maya, in which the games
narrative begins. I will include a series of lighting effects for advertisement
signs, and separate assets/props outside the shop; being a bench, traffic cone
and a bin. Each being properly UV mapped, unwrapped and textured.
How do I intend
to do this?
I will begin my project by conducting
extensive research, gathering a variety of images as references for each asset
I intend to build. From these images I will create a series of hand drawn and
digital images using sketchbooks and Photoshop as part of my preproduction process.
I will then begin building the assets in 3D
using Maya. After I will UV map the models
and manipulate the UV's to fit the textures
that I have gathered in my research.
With all my assets mapped and textured, I
will add lighting to set the scene of the model and animating a camera, create
a 180 degree turntable render, showing the front of the shop.
Why do you
intend to do this?
I want to bring the games narrative, style
and genre to life, creating a piece of art that
provokes strong feelings of dread,
highlighting the games dark connotations. Following the story of the
character's tough relationship with his wife, fighting to save their daughter
from certain death by an evil cultist group.
Assessment Work:
I will be submitting the following for assessment:
ñ Learning Agreement
ñ 2D hand drawn and digital pre-production
images
ñ Shop turntable render (.mov)
ñ Maya project folder containing all the
individual assets and textures
ñ Project blog
ñ Project 500 word evaluation
ñ Self evaluation
Schedule of
Work: (to include the deadline for submission of
assessment):
ñ Research, collecting source images and
blogging findings (ongoing throughout
the project)
ñ 2D digital/hand drawn pre-productions
images
ñ 3D asset building
ñ Manipulating textures for 3D assets
ñ Add lighting
ñ Combine separate models together to
create the final model
ñ Create a turntable render as .mov file
ñ Complete evaluations and research journal
(Blog)
Submission: 10/05/2013
To see full details of schedule of work, see
digital calendar on my Blog or as a separate
PDF file.
Resource
requirements:
N/A
Tutor's
comments:
Learning
agreement agreed and signed by:
Course Leader:
....................................................
Date:............................
Unit Leader/Tutor:
....................................................
Date:............................
Student:
....................................................
Date:............................
In a nutshell, I
am going to construct the front of a Japanese shop, which includes the flat
above it, which I built part of in BA5. I am going to aim to create detailed 3D
lettering, a number of small assets/props and test my newly learnt Maya skills
by attempting some new texturing and modeling techniques, by making glass
windows, advertisement lighting effects for the shops lettering and attempt
some form of rounded modeling for the roof tiles or something as simple as a
dustbin lid.
My entire BA5
model was fundamentally square objects, but now I believe I have the skills and
better time management, I feel I can aim much higher.
In BA5, Sophie focused on 2D art, and put together a mass of images of the shop for her final
submission. She said I can use these images, plus the reference images she
acquired to support my 3D model. I found out that the shop she drew was a
construct of a variety of different reference images. She took bits out from
each picture and merged them into one.
Using all the
different images I aim to hand draw a few sketches of all these different shops
she used as reference images and digitize a couple of them as final reference
images I will use when building my final model in Maya.
But before I can
start all that stuff for this project I need to get my research material.
Weighing up what
I need to support my 3D model I will need images of Japanese benches, traffic
cones, advertisement signs, lighting techniques, trash cans and initial shop
designs. All these I can easily obtain from Google Images, and will be uploaded
to my Blog throughout the project as I progress through making all of my
assets.
I will also
include screen shots of my finished assets in Maya, and if I have time include
mini tutorials about how I made them.
I planned to
include tutorials in the last project, covering all my progress, but it was too
much to handle so I stuck with what I had time to do and uploaded notes that me
and my peers had done instead of screen shots.
I have gathered
reference images for all the different parts of my model. I will be making a
trash can, bench, traffic cone and possibly if I have time; some hanging
lanterns over the shop, to give the shop a real Japanese feel.
I have also
included images of advertisements, to find out about Japanese advertising on a
large and small scale.
As my model will
be well lit, I had a look into lighting for advertising and general use in
shops, homes etc...
Below are the
images I gathered covering all aspects of my Maya model.
<!--[if !supportLineBreakNewLine]-->
<!--[endif]-->
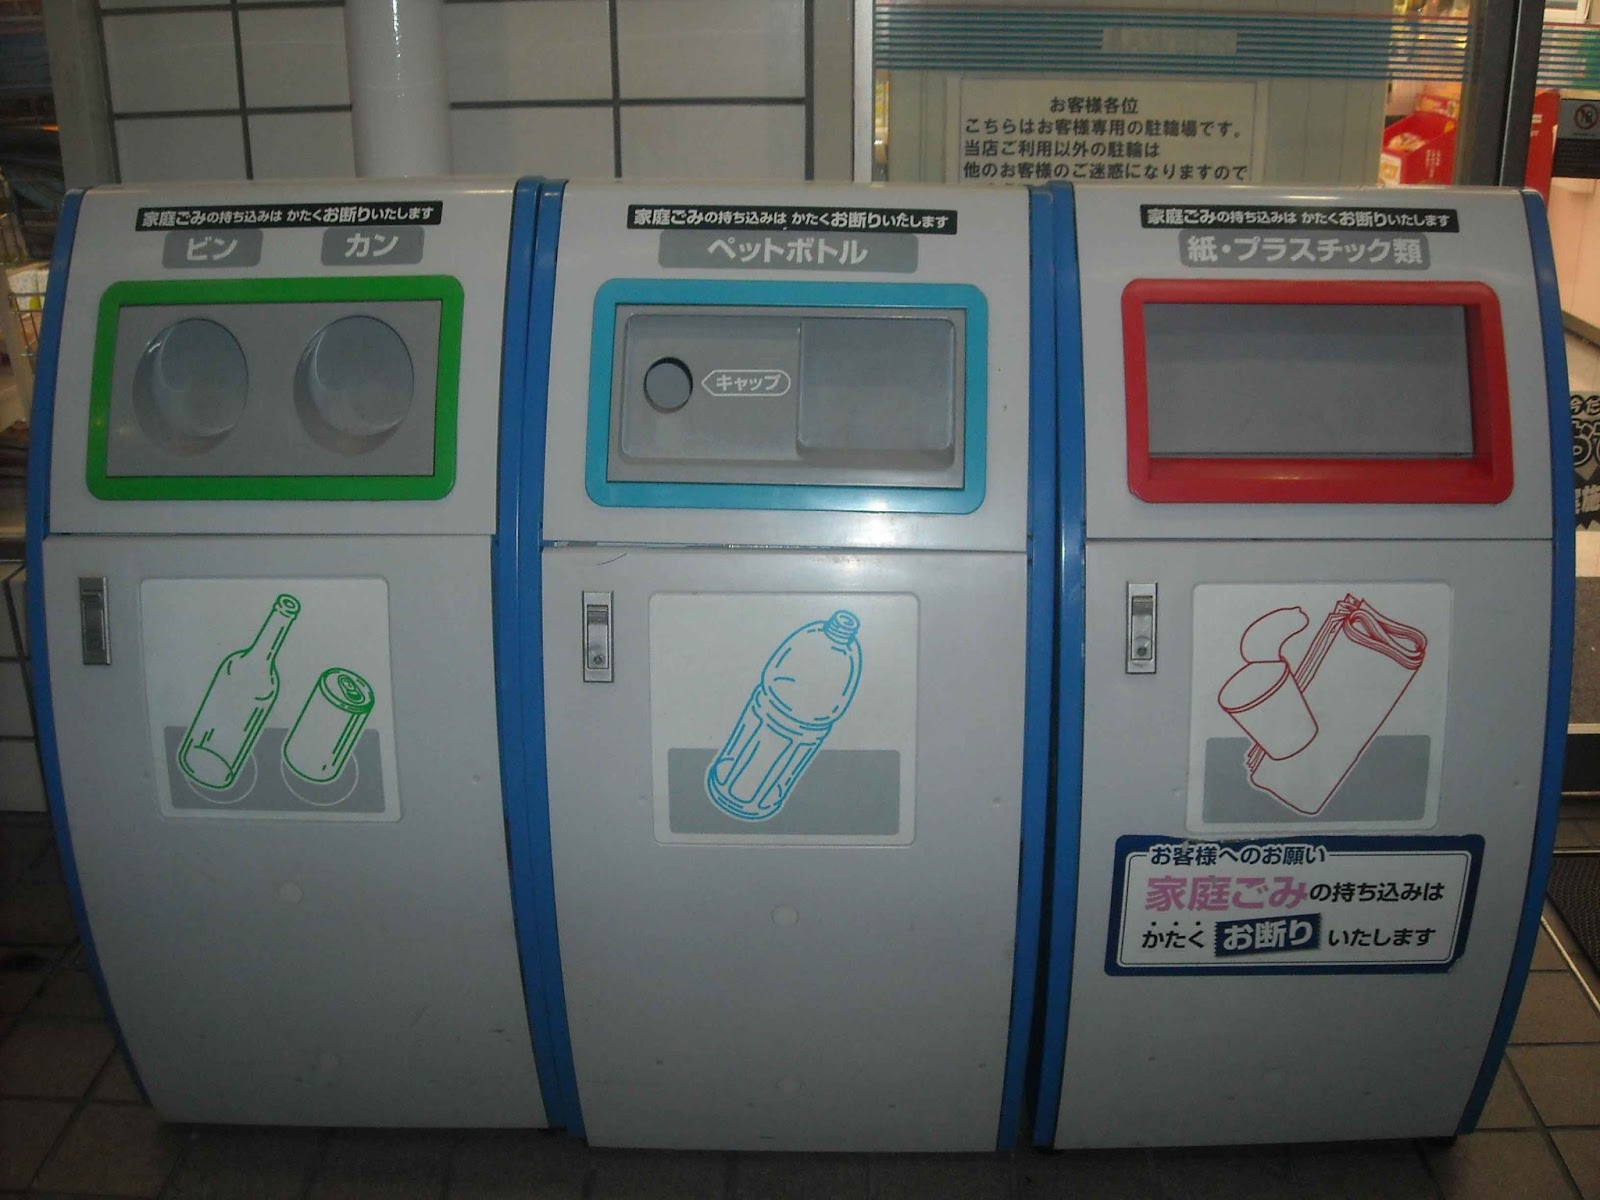
Japanese Shops
Although I technically had an image
reference from Sophie's art work ready to go, its important to gain an understanding
of the layout of a small Japanese shop. I didn't want to go in Maya all guns
blazing, not knowing exactly what I am making. The image provided by Sophie was
digitally painted, so I may misinterpret some of the features she included. I
did find one that I had to double check. In front of the shop, by the bench
there is a trash can. I looked at online pictures of Japanese trash cans and
there are none, which match the one she drew. Below is the image that Sophie
drew that I will be focusing my model around.
Among the mass of reference images I
obtained I will label the images that Sophie used to create this piece of art.
 |
| Colour version of Sophie's digital painting of the shop |
 |
In game version of the painting. The games connotations to the story is black and white with yellow being the significant colour. In this case I am going to make the model in black and white and experiment with a colour version if I have time.
|
 |
| Image 1 |
.JPG) |
| Image 2 |
 |
Image 3
The three images above are the reference images Sophie used for her painting of the shop.
The door for the painting was taken from Image 1. A traditional Japanese sliding door, with mini glass windows all over, to illuminate the inside of the shop.
The large sign above the shop in Image 2 was used as the main shop sign in the painting.
The sign above Image 3 was used below the main sign.
The other signs in painting are small advertisements extracted from a number of the reference images below. The traffic cone and bench outside were found separate from the shop images and required further reference image research, which I have provided below, to have to fall back on when constructing the models in Maya for the final model.
|


An interesting aspect that I have found with all the shops above is that none of the dominant signs have any form of man made lighting above them. The much smaller signs below do. This is done because, the larger signs are much more noticable from a distance and are generally lit up by the surround street lights, esspecially in cities and towns. The smaller signs include much more detail for people to read and do require further lighting.
I will follow the same lighting system in my project and provide man made lighting for the smaller sign and use general directional lighting for the lareger sign.
Additional Assets
As well as modeling the shop in Maya, Sophie including a couple of smaller assets being a bench, bin and a traffic cone, which I am also going to model using Maya. Below are all the reference images I extracted from Google Images.
Final Asset Reference Images
 |
| This is the cone that Sophie re-invented in her painting, so I am going to stick with her chosen reference and re-build it in 3D |
 |
| My Maya skills are still limited and I want the shop to be the initial focus point, so I have chosen a simple Japanese bench design that will potentially cause me the least trouble to make and texture |
I will use a combination of Sophie's paintings and the real life images she found online as my model reference images to get an idea of structural layout and scale.
To create an illuminated shop I am going to experiment with a variety of different lights in Maya to see what is the best.
A modern Japanese bin is the next asset on my production list. I found a number of different bins on Google Images.
In comparison to the one in Sophie's images, I didn't find a traditional Japanese bin exactly identical to the one she had painted. I found a number of alternatives to choose from.
 |
| Original bin reference image from Sophie's painting |
After having a mosey round the Internet. I decided to go for the bin shown in the image below.
Pre-Production Images
Here are a few images I sketched up for the project as additional material. I am also drawing a couple of images on Photoshop. I am drawing over the shop I drew by hand and experimenting with a couple of different styles. Here are my images.
 |
| Hand drawn images |
 |
| Bins and Lamps |
 |
| Bins |
 |
| More Lamps and writing art |
 |
Sketched Version
|
 |
| Painted Version |
 |
| Painted Version 02 |
 |
| Textured Version (used all the un-occluded textures for my Maya model and put them over my 2D sketch) |
I thought that this bin best suited the retail district in a Japanese settlement. Its modern, and the shape gives it modern sophistication, which I am willing to attempt in Maya for my final project piece.
Today I began production of my bin model. With thanks to help from Jack Eastoe I managed to finish a bin model, plus its UV maps. I have extracted textures from CG Textures (
http://cgtextures.com/), which is a site with an entourage of different textures for all sorts of models.
A very productive first day back in the Media Lab. I learnt a couple of new things about Photoshop for my textures and got a lot of basic Maya work done ready for the tough UV mapping.
In the last project (BA5) I textured my model in black and white, using ambient occlusion. It looked awesome when I was finished. This time I am aiming to do the same but in colour, and also include a specular and diffuse map to add additional detail to my model.
Firstly I wanted to ensure the textures look good plain and simple with no fancy shadows and other effects used in Maya. I have completed adjusting all the UV's and textures accordingly for my bin. The next stage was where I got a new taste of some features in PS. Clone stamp tool and applying lightweight shading effects in certain areas of the texture for realistic effects.
The clone tool simply paints a replicated picture over something else from a selected point of an image.
The shading effects were done by creating a new layer, lowering the transparency and brush. After that I swabbed colours from the texture and painted them over the textured UV's.
Here are my finished mapped, textures for the bin, ready for testing in Maya.
Already I can see the difference. I can't wait to see them in Maya with added effects and rendered in the correct lighting to really set the mood for my model.
Looking back at Sophie's painting of the bin, it is a huge change. After extensive source image research I did find that most litter bins in Japan are green, and as the aesthetic look of the scene is somewhat old and partially modernized, the rusty look on the bin is ideal.
Final Construction Process
I initially focussed on completing the assets frist, in the case that I ran out of project time to complete the main shop model, I could submit the assets as my final piece.
Luckily I had plenty of time, and I am now in the rendering process.
There were a lot of other adjustments I wanted to make to the model like adding specular maps and ambient occlusions, but when I came to attempting these effects, my computer crashed, as well as the ones in uni. Looking at the current state of my model I am very happy with how it has turned out. Each texture I used was extracted from CG Textures and then uniquely altered to fit the mood and environment of the model.
I have learnt a lot about Photoshop and manipulating UV's properly in Maya in the last few weeks.
Here are some examples of textures adjusted to the UV's ready to add to my model.
 |
| The side door for the upper flat |
 |
| Side wall of the shop |
 |
| The roof. Was grey, but adjusted the hue and saturation to give it a worn red shade |
 |
| The sliding door, shading done using a series of different adjusted brushes and two different textures. One fabric and the other wooden |
 |
| the side of the bin. The trash logo is placed onto the according textured UV's to get the best alignment once uploaded into Maya |
 |
| The interior metal of the bin. I added some additional mucky shading to create effect |
 |
| The bench back rest UV's. Same method was used with the brushes like the interior of the bin |
 |
| The cone's wrapping texture. The writing was taken from Sophie\'s original reference image from BA5 |
And here is a final render of the shop with all the assets.
I used a number of different lights to create the initial effects I wanted, I used directional lights to surround the model, a natural light to create an ambient glow. For the shops lights I used spot lights to create a sharp single light pointing down to light up the small sign and the door.
I also dug out some more reference images I used for a numerous areas of my models textures. i have also included original copies of the textures I used, before manipulating them.
These are textures I used to make the road and the footpath. The white line was made using a rectangle with some added shading to darken it, matching the rest of the grounds texture.
 |
| Road |
 |
| Footpath |
 |
| Footpath |
 |
| Curb |
 |
| Background for the large sign |
 |
| Fabric used on the sliding door |
 |
| Wood used on the sliding door frame and the shops window frames and sills. |
 |
| Concrete used as the surrounding structure of the shop |
 |
| The door used for side access to the flat |
 |
| Curtains used in the window of the side door |
 |
| Metal used on the stair way |
 |
| Rusted metal for the signs frames |
 |
| Roof tiles |
 |
| Roll down covers used on the windows |
 |
| Rust used on the mini lamps over the signs |
 |
| The rusted background for the lower sign |
 |
| Additional wooden texture used fot the sliding door frame |
This project has currently taught me two important things. One being when using Maya, think about the textures and how they will look on your model. there is no point making a highly detailed model if you are going to use a simple set of textures, with pre-assigned detail on them. For example, my roof is a simple flat plane. The texture included all the detail. the same applies to the door and the shops signs. Its all about the detail of the textures not the mesh. it also makes UV mapping a whole easier too.
Lesson number two; ensure all UV's are properly adjusted in accordance to the chequer box texture before applying any textures, or they will look horribly stretched and out of proportion. When I was making the textures for the signs, I thought so long as the texture fits the UV snapshot properly in Photoshop I didn't have to worry about the chequer texture. I was so wrong. The signs frames were horribly stretched, sticking out to the other textures that were properly aligned.
Check your objects on a regular basis ! When I started out with the assets, I had a massive number of issues regarding duplicated models inside other models, hidden faces and additional vertices that weren't needed. Luckily I picked this up at an early stage so it was easy to mend.
The worst of the issues were on the bin. The computer was running stupidly slow every time I loaded the bin up. Also, every time I clicked on a shape the texture would change. I took a risk and hit delete. It luckily fixed the problem. I had made 5 duplicates of the entire bin. Once cleaned, Maya was running much smoother.
The lighting process was full of issues, which I had to avoid through simple compromise. I wanted the shops lighting to be sharp but revealing at the same time. Not possible sadly, so I had to compromise with having sharp spot lights pointing down. They do the job, but they are still too bright. Lights on the end of the model were the initial problem, shining through the walls, which is un realistic. To fix the problem I adjusted the rotation of them, aiming them in wards. The adjustments are easily noticeable in the render, but it fixed the problem.
I had a similar problem with the directional lights and the natural light too. But once again I couldn't win, so I used a few lights and had them all dimmed so they wouldn't make the environment glow.
Ambient Occlusions
With help from one of my course mates, I managed to add ambient occlusions to my textures, making the textures even more sophisticated. Overall the model was dark, but the occlusions made it darker. I had to adjust the lighting to get the textures just right but I was happy with the turn out.
Here are a couple of examples of what the textures looked like after I applied the occlusions.
 |
| Wall before |
 |
| Wall after |
 |
| Shop sign before |
 |
| Shop sign after |
 |
| Shop sliding door before |
 |
| Shop sliding door after |
There are huge differences. Each texture now has its own darkened shade, further adding to the effect I was aiming for.
It turns out I had a number of settings wrong when attempting occlusions myself, being the reason why my computer was crashing. Once I was shown the right way it worked in seconds. I had to return to Photoshop to re-do all the textures and re-name and organize them, but it was worth it.
When it came to rendering I stuck by one way I knew. Animating a camera in the form of a turntable. One of my other course mates showed me a really cool way to get the camera on a perfect rotation without any trouble.
Create a circle, center it with the model and scale it out to create a decent radius for the camera to follow. Next stage was adding the camera and then parenting it with the circle. This meant the camera would rotate in line with the circle creating a perfect rotation.
Next stage was simply animating the camera, by splitting the first to last frames up into 90 degree sections. Every X number of frames the camera would rotate 90 degrees until it completed its full rotation. This took some time as the camera angle was always a little funny, so I had a play around until I got the perfect angle.
I then performed a batch render, turning each frame into an individual JPEG image. I gathered the images together and imported them into Premier Pro, creating a video playing each image back to back, creating the final turntable render.
Here's one of the screenshots from the final render.
One initial mistake I made this render. Thank god I didn't submit this as my final piece. The model is poorly lit. The lower areas of the model are clearly defined, but the larger sign above is hardly noticable, and that is mainly because I applied ambient occlusions on all my textures, significantly darkening them all. I will re-render the model with a new set of lights, further illuminating the model.
Here is the new render I have done, ready for my final submission. The building as a whole is lit up a lot better than before, making the model easier to see and define by the audience.
Below is my project evaluation:
BA6: Studio Project ‘Specialization’ Evaluation
This project gave people the opportunity to work on
something that they specialized in. The options varied from 3D to 2D, in sculpting,
drawing, animating, character modelling or level design. I chose to continue on
from BA’s 4 and 5, where me, and my team mate Sophie worked on re-inventing a
game given in BA4. For BA6 I designed and made a 3D model of a rundown Japanese
shop, with an apartment above it where the games main character lives. The model includes the main shop, plus a
number of small, additional assets; a bin, cone and a bench.
This project was my biggest yet, so I put together a mass of
reference images and a number of pre-production sketches, ranging from hand
drawn to digital painted images.
As a start to my model I looked over the reference images I
obtained and looked at what aspects of a selection of images I could use and
combine them to create my model. My team mate in the BA5 project had drawn a
number of images of the shop, using different colour combinations. I decided to
use these as my primary reference images, and construct the assets from
separate reference images.
I initially focused on the complexity of the textures for
this project, as I have found that the mesh can be really simple, and the
detailed can be defined by the texture.
The shop was constructed from a variety of separate objects;
to create a set of tidy UV’s to make the texturing process easier, than having
all the polygons of one model on one map, tightly packed together. I mapped all
my UV’s through planar and cylindrical mapping, depending on the shape to gain
simple, flat, constructed UV’s without snapping any additional edges together.
The UV maps were then added into Photoshop, where I added in
the textures from a website called CG Textures (see blog). I was planning to
add an ambient occlusion to the model as well, but I wanted to make sure all
the textures would work okay. I had a few tiny problems with some textures,
which weren't showing up in Maya Render View, so I had to save them as a
different image format in Photoshop. Since I wasn't making the model game ready
I saved the textures as JPEG. But some of them didn't work properly in Maya, so
instead I saved them as TARGA and they showed up fine after that.
To apply the ambient occlusions, I had to refresh my mind a
little by looking at some tutorials on my university mates blogs. It was a
straight forward process setting up the occlusions in Maya. I just had to make
sure I had named all the different occlusions in accordance to their object;
e.g. bench_legs_occ. I was determined to make this project as organized as
possible. In the last project (BA5) I spent hours going through all my
Photoshop documents re-naming everything and filing it accordingly.
The occlusions came out really well. After a few tweaks to
get them just right I re-applied the textures with the occlusions and then
moved onto lighting.
In my learning agreement I talk about the dark connotations
of the game idea, so I wanted to have the model as dimly lit as possible, but
not too much that the audience can’t see it. This process took a vast number of
renders, as when you turn on the view light option in Maya, the display doesn't actually show exactly what the model will look like when it is rendered, so I
had to be sure there were no lights shining through walls, or any out shining
others, making them out of place. I used a set of directional lights around the
model, to illuminate it for the turn table. For the initial shop lighting I
used a set of spotlights, positioned under each lamp shade. It was also
important to include a natural light. It was the brightest of all of them, so I
had to make a lot of adjustments to ensure it wasn't lighting up the model too
much.
Once I had added all the lighting, occluded textures and was
happy with how the render looked for the turntable. There was something
missing. It was unrealistic how the shop would be floating in the air, with
black all around it. I decided to build a surface for the shop to sit on. I
went ahead and made a simple battered road, with a sidewalk. The texture I
obtained fitted the model perfectly. I had to make a number of alterations to myself,
such as adding a white side line by the side walk and some shading to add to
the occlusions dark, shadowy style.
The rendering process was another learning curve for me. I
had never had any proper tutorials on animating a camera and rendering it as a
video file for submission. What I did was create a circle and center my model
inside it. I added a camera to the scene and positioned it in line with the
circle so I could parent the camera with the circle, allowing it to move round
the circles line in a perfect rotation. I was then able to enter the view point
of what the camera see’s and adjust it so the audience could gain a full view
of the entire model during its 360 degree rotation.
Once the camera was positioned correctly I created a set of
key frames, where the camera would move to each point indicated through the key
frames. As I was animating a full 360 degree
turntable, I divided 360 into 4 and set the camera to turn a quarter of the
circle at a time.
To render the video I went into Rendering Editors and set
the number of frames I wanted rendering, the video size, the format I wanted
the individual frames to be saved in, and the labeling type of the frames. I couldn't remember how to name the files so I had to consult my lecturer, and he
pointed me in the right direction. Once all the settings were correct I clicked
Batch Render.
Once the render was complete I had 192 individual frames to
condense into a video file. I used Premier Pro for this. I imported the images
into Premier. Each frame was playing back at 5 seconds, so I had to adjust them
to point 1 of a second, to create a perfect flowing video. To finish off I
added my name and blog address in the render for the lecturers benefit, and
rendered it as .mov file all set for submission.
This project has been the best yet. I was able to carry over
all the skills I learnt from BA5 and integrate them into this BA6 project. I
have worked in perfect synchronization to my learning agreement, producing a
fully textured, detailed 3D model with additional digital images,
pre-production sketches and researched reference images/textures to back up my
final model.


.JPG)